Figure 1: Wooden and Iron Wire Cranks.
| Home | Equipment | Ropemaking |
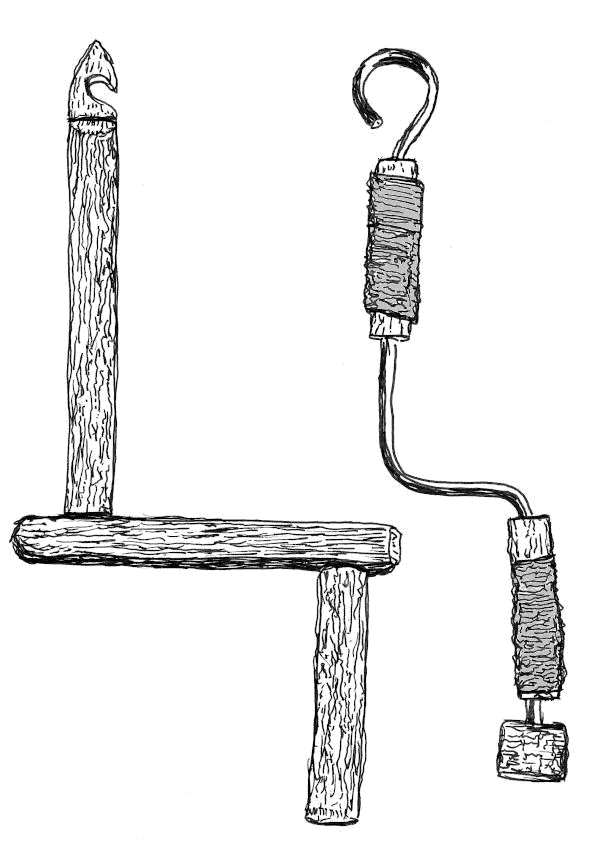
Figure 1: Wooden and Iron Wire Cranks.
The biggest design factor is the cross piece between the two handles can't be too long, or the cranking motion is awkward. If the cross piece is too short, you won't generate enough torque to twist heavier cords. Very small circles are also awkward. Four to six inches is a range that works for me.
The hook opening on the two cranks in Figure 1 face opposite directions. So you hold the wooden crank by the back handle and it hangs with the hook up. But you hold the wire crank by the front handle to keep the rope from falling off the hook. Neither is better. It's just a preference for how you like to hold your tools. In my case, it was just an accident of how I put the cranks together. I wasn't working from any distinct design.
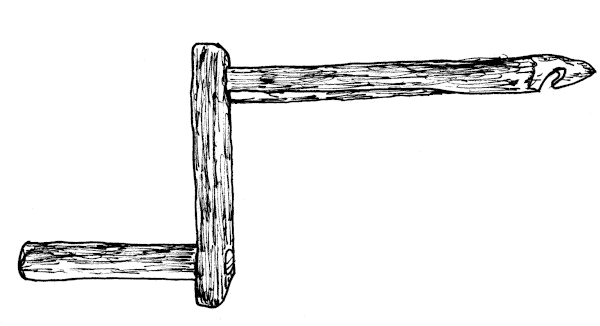
Figure 2: Wooden Crank.
The cross piece should be a split resistant wood, like elm (Ulmus spp.) or osage orange (Maclura pomifera).
The handles need to take a smooth finish, without splintering.
To make the hook, drill a hole through one of the handle pieces, perpendicular to the grain, about one inch down from the end. Saw about 1/3 the way through from opposite sides of the handle, about an inch below the hole. Split off the extra wood, down to the shoulders, then cut out the notch with your saw.
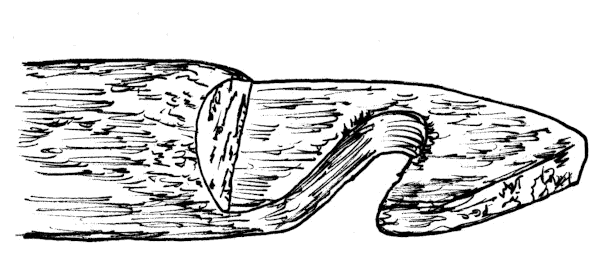
Figure 3: The Hook End.
Drill two holes in the cross piece, slightly smaller than the diameter of the handles. Trim the ends of the handle pieces to fit snuggly into the holes. Cut a slot in the ends of the handle pieces, as deep as the cross piece is thick. Glue and wedge the handles into the cross piece. Make sure the wedges are perpendicular to the cross piece's grain. This will put the spreading force in line with the grain, reducing the chance of splitting.[815]
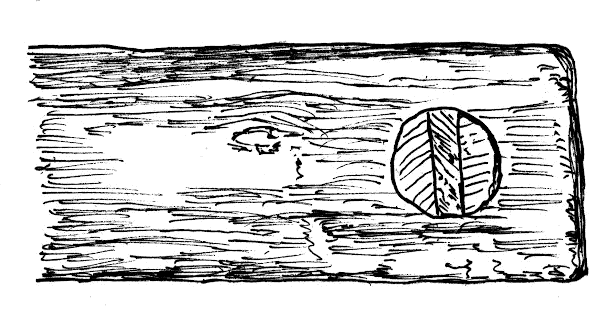
Figure 4: Wedged Handle Joint.
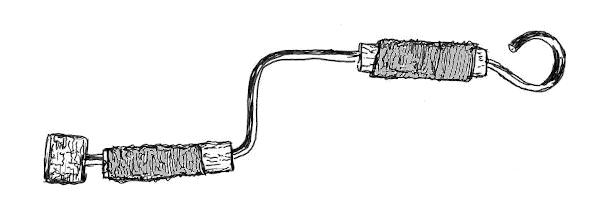
Figure 5: Wire Crank.
I bent the hook on the pictured crank around a broomstick clamped in a bench vise. This one was made with 3/16" round stock. Depending on the diameter and the metal, this can take a lot of force to bend cold. A better solution is to take your round stock to a blacksmith at the next Market Fair, and pay them to do a professional job. I have yet to find a blacksmith that will turn down this kind of work.
The skinny wire is really uncomfortable if you have to crank for a long time, particularly if you are using a lot of torque. That's where the handles come in. Drill holes down the length of the handles, and slide them on the crank before bending the hook. Or you if you've already formed the hook, you can split the handles along the hole's length, and glue the split parts back together, being careful not to get glue on the inside of the hole. Wrapping the handles with twine keeps them from splitting (again). Any whipping like you use on the end of a rope will do.[040]
Some trees, like Black Walnut (Juglans nigra), have a pith core in their branches. This makes a good starting guide for the handle holes.
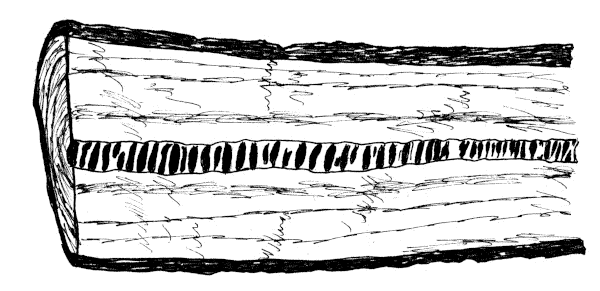
Figure 6: Split Black Walnut Branch.
Finish the crank off with a knob at the end of the back, to keep the rear handle from sliding off.
| Colophon | Contacts |