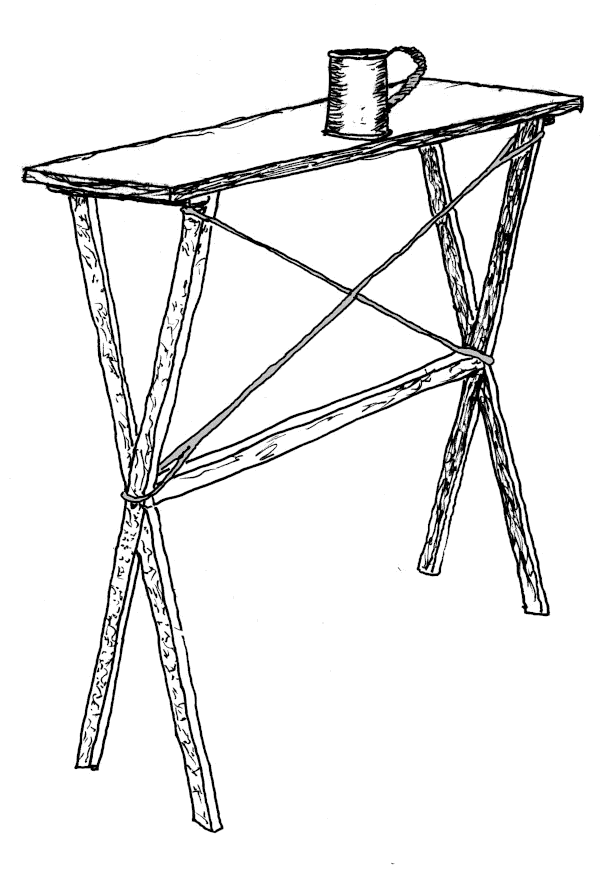
Figure 1: Simple Table - Version 1.
| Home | Equipment | Ropemaking |
Figure 1: Simple Table - Version 1.
At Market Fairs, camp-outs, and other reenactor gatherings, I try not to be embarrassing. Draping a table cloth over a store bought table just feels wrong. (OK, I'll admit that I made an 18th Century cell phone holder. I'm not completely correct.)
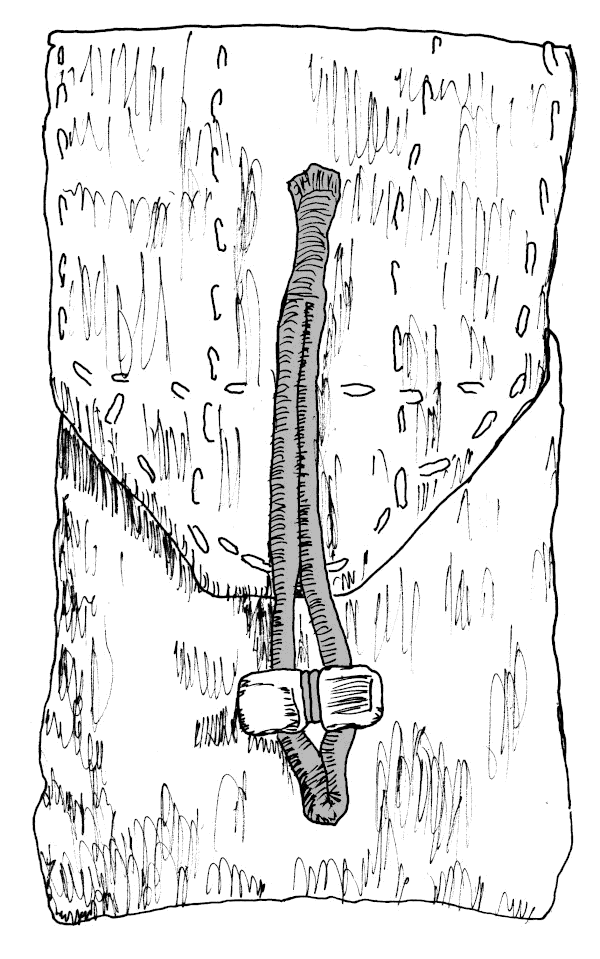
Figure 2: 18th Century Cell Phone Case.
Just like the ropemaker's bench, this is not a replica of any known table. But you will find similar table legs in Diderot and d'Alembert[252]. I designed it based on what I thought I needed, using the period appropriate tools and methods at my command. I'm not a genius. If I could come up with this plan, then a ropemaker 250 years ago could have, also.
So I wanted somewhere I could safely put my tankard of ale, where it wouldn't get kicked over accidentally.
This table is simple, and elegant. The legs cross with a half lap joint, secured by the horizontal stretcher. Pegs at the top of the legs fit into holes in the table top. There are also horizontal cleats on the bottom of the table top, just outside of the legs for further support. The legs and horizontal stretcher are held in place by the two diagonal cords that also keep the table from shifting end to end.
A great design. It lasted one market fair.
It was unsatisfactory for several reasons.
With another market fair coming up, I began work on...
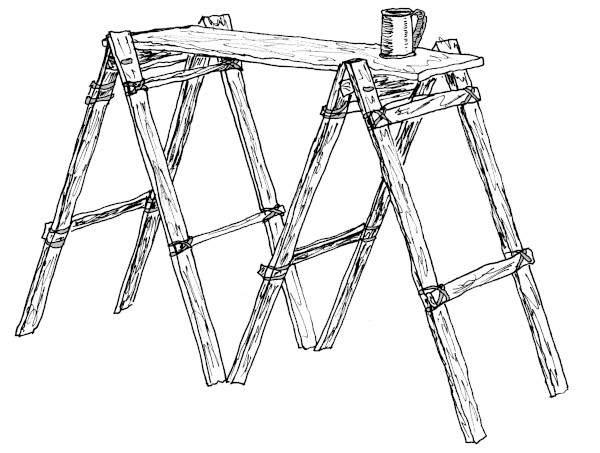
Figure 3: Simple Table - Version 2.
I kept the table top, since that part worked fine. Next, I made two saw horse trestles for the legs. The legs were approximately 1 x 3 inches, possibly old bed boards. I pinned some cross pieces with dowels and glue, then secured the joints with square lashings. The space between the inside edge of the legs was just wide enough for the table top.
The tops of the frames were drilled and loosely tied, as you can see in Figure 4, below.
|
|
|
Figure 4: Top Joints - Table Version 2. Joint Open |
Joint Closed |
A piece of 2 x 2 sat on the strings holding the two frames together, and the table top rested on the 2 x 2s. The trestles were moved around until the 2 x 2s were snug against the inside edges of the table top cleat.
The string connections at the top of the trestles provided plenty of adjustability for setting up on uneven ground. And eight legs meant there was always more than three feet touching at any one time. The trestle width being greater than the 10 inch table depth also greatly improved stability.
This "temporary" design lasted for several years. But the Corona Virus rules for the 2020 Colonial Market at Mount VernonMaps meant I needed something to keep me and my assistant away from the visitors. I needed another table.
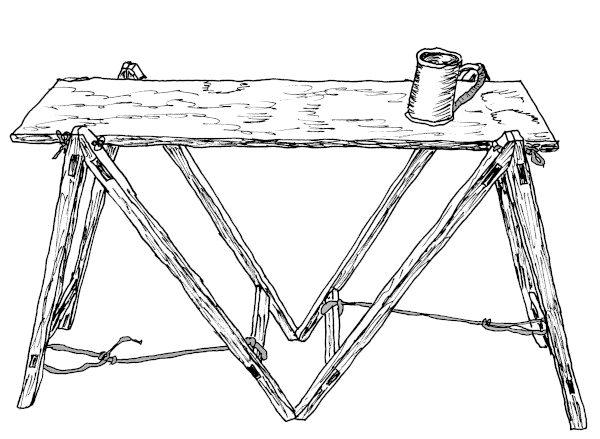
Figure 5: Simple Table - Version 3.
I had plenty of time to plan and build my new table, and several years of working to identify weaknesses in Table Version 2. This was a new table top, still 10 inches wide, but six feet long! The saw horse trestle legs were fine, mostly. But the lashings got sloppy as the cords slowly stretched due to time and weather. I needed a more rigid joint for the legs and cross pieces
The new trestles have 2 x 2 inch legs. The cross pieces are connected by doweled mortise and tenon joints. The table top now rests directly on the top cross pieces. The cross pieces are made from the legs of Table Version 2. Recycle, repurpose, reuse.
Since I had the time and material, I also made a new set of trestles for Table Version 2 while building Table Version 3. I had to. I'd cannibalized the Version 2 legs for the Version 3 cross pieces.

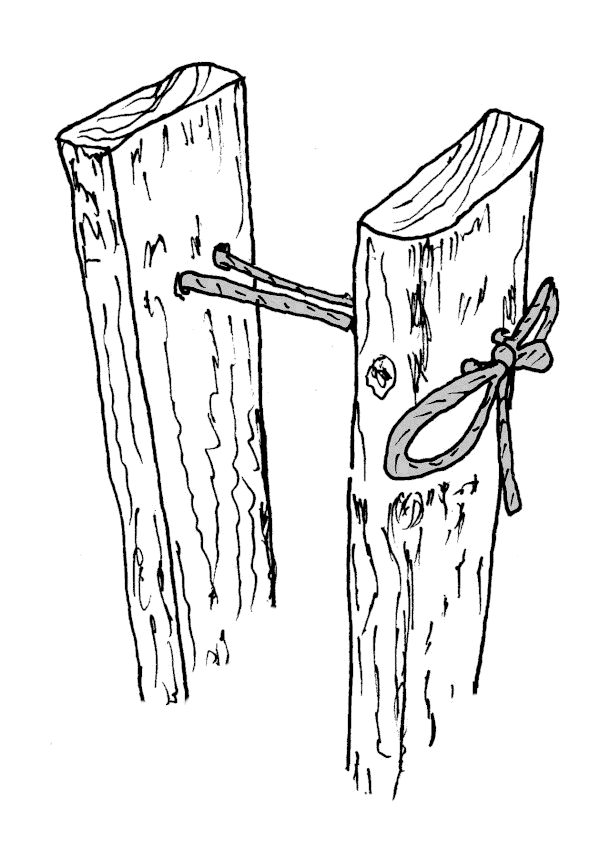
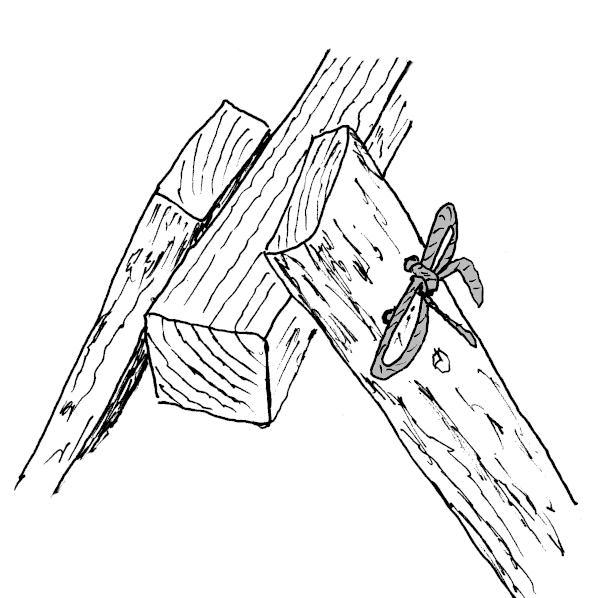
Figure 6: Top Joint - Table Version 3.
The tops of the legs are trimmed at a 30o angle, so when they're pulled tight, the frames come together at 60o. The tops are drilled so I can thread a toggled cord to tighten things up.
The legs are really too narrow for two string holes, as on Version 2, so I drilled a single hole, and used a toggle arrangement to hold the top together.
There's a rope between to lower cross pieces to keep the legs from spreading more than 60o.
The old table top is still working fine, accumulating a nice collection of dings and stains.
I nailed copper tacks into the new table top, every foot, in case I need to measure
anything. There's an extra tack at one end marking 6 inches.
Soften the edges, a little stain, some wax, and they both work as good as they look.
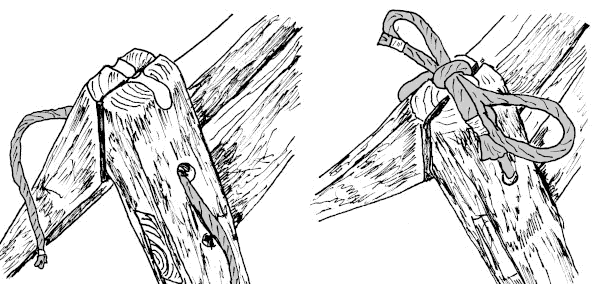
Figure 7: Version 3b Top Connection.
Now I just tie the ends of the cord, and the joint is closed. Packs better too.
To set up:

When taken down and folded up the two tables are:
| Length | Width | Height | Weight |
| 43" | 14" | 7" | 20lbs |
| 72" | 14" | 7" | 25lbs |
Not a bad load for a mule. And easily fits in my truck.
| Colophon | Contacts |